
If you’ve opened QuickBooks recently and saw a “QuickBooks subscription has lapsed or expired” — you’re not alone. Thousands of users experience this issue every month, especially when their subscription renewal fails, or a payment method expires.
When your QuickBooks subscription has lapsed, it can feel like your entire workflow comes to a halt. The error prevents updates, blocks essential online services, and interrupts your productivity—but the good news is that it does not harm your company data.
Whether you use QuickBooks Online or QuickBooks Desktop, this error can temporarily lock you out of your account and disrupt your workflow.

Don’t worry – this guide explains why the QuickBooks subscription expired message appears, how to fix it quickly, and how to prevent it from happening again.
What Does “QuickBooks Subscription Has Lapsed/Expired” Mean?
When you see messages like:
- “Your QuickBooks subscription has expired”
- “QuickBooks subscription has lapsed ”
…it simply means that your billing validation failed. QuickBooks couldn’t verify your active subscription with Intuit’s servers.
This could happen for many reasons — from an expired credit card to a temporary billing system glitch. Until your subscription is renewed, your account remains restricted.
If you’re dealing with a QuickBooks subscription has lapsed or expired message — whether it’s a QuickBooks Online renewal issue, a QuickBooks Desktop subscription lapsed error, or a QuickBooks payment failure, don’t let it interrupt your accounting workflow. Our certified QuickBooks experts can help you reactivate your account, renew your plan, and restore full access instantly. Contact QuickBooks Support at 1-877-423-9324 for fast, reliable assistance with all types of QuickBooks subscription renewal problems, billing failures, and expired account errors.
Common Causes of QuickBooks Subscription Expiry Error
Let’s look at why QuickBooks subscription renewal problems or payment failures occur:
- Payment Failed or Declined: Your card may have expired, been declined, or lacked sufficient balance — leading to a QuickBooks subscription payment failed message.
- Auto-Renewal Disabled: If you turned off auto-renewal manually, your QuickBooks subscription not renewed message may appear after your billing cycle ends.
- Expired Billing Information: An outdated billing address or card number mismatch can trigger a QuickBooks subscription renewal failed error.
- Intuit Server Glitch: Sometimes, the issue isn’t you — it’s a temporary outage or billing verification delay on Intuit’s side.
- Regional Subscription Transition: In countries like India, Canada, or the UK, QuickBooks billing cycles or subscription policies may differ slightly, leading to confusion about renewal dates.
- Trial or Promo Ended: If you were using a trial or discounted plan, you’ll see a QuickBooks subscription expired message once the offer ends.
Common Effects of the QuickBooks Subscription Error
When the subscription verification fails, you may encounter:
- Occasional data loss or missing journal entries
- Error codes such as QuickBooks Error 3371: Could not initialize license properties
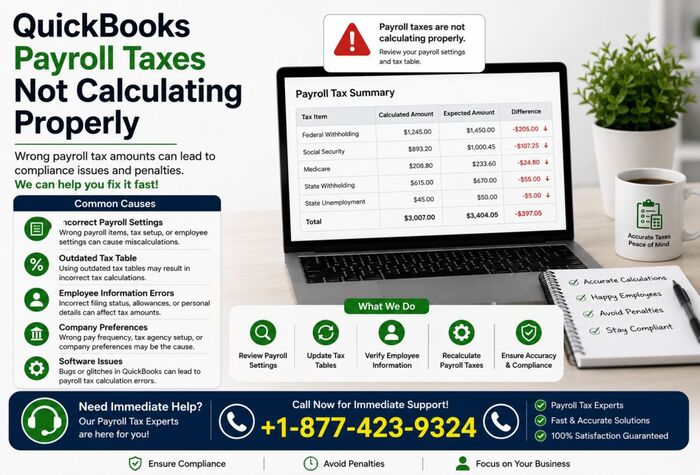
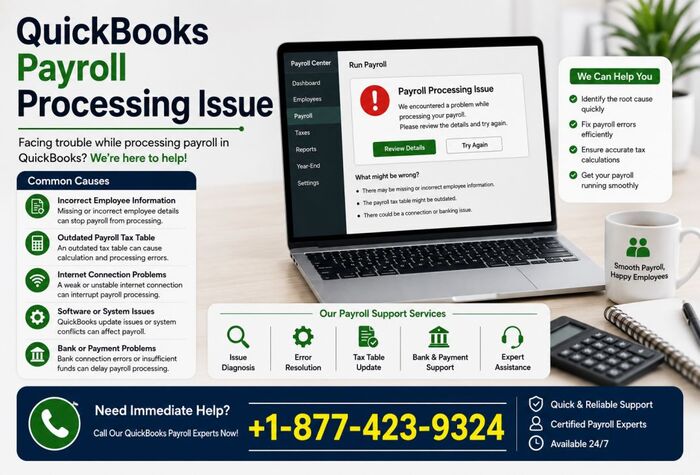
- Issues opening or updating payroll tax tables
- The inability to install new software or security updates
- Missing PDF components or printing-related problems
- Restricted access to advanced features
These disruptions highlight the importance of resolving the issue quickly.
Solutions to Fix QuickBooks Desktop Subscription Has Lapsed
If you use QuickBooks Desktop, the error might appear even after renewal. Here’s how to fix that:
Solution 1: Update Billing or Credit Card Information in CAMPS
If you recently changed your business credit card or bank account but forgot to update the payment details, it may trigger the “QuickBooks Enterprise Subscription Has Lapsed” error. This issue occurs when your subscription renewal fails due to outdated billing information.
- Sign in as an admin to your Customer Account Management Portal (CAMPS).
- In the Products and Services section, locate and select the version of QuickBooks Desktop you’re currently using.

- Go to the Billing Information section and click Edit.
- Update your payment or billing details, then click Save and Close.
- Launch QuickBooks Desktop, then navigate to the Help menu.

- Select Manage My License → Sync License Data Online to refresh your subscription status.
To fix this, follow these steps to update your payment details:
Solution 2: Verify and Correct System Date and Time
Incorrect system date or time settings can also prevent QuickBooks from functioning properly. When the date and time are inaccurate, it may interfere with software updates, license verification, and internet settings.
Follow these steps to correct them:
- Right-click the clock or date/time display at the bottom-right corner of your screen.
- Select Adjust Date/Time.
- Click Change Date and Time.
- Manually set the correct date and time, then click OK.
- Click OK again to confirm your changes.
- Restart QuickBooks Desktop and check if the “Subscription Has Lapsed” message is resolved.
If you still see QuickBooks Desktop subscription has lapsed, uninstall QuickBooks → reinstall → reactivate using your product key.
Solution 3: Run the QuickBooks Install Diagnostic Tool
If QuickBooks displays the “QuickBooks Desktop Subscription Has Lapsed” message, it may be due to damaged or missing Windows components required by QuickBooks. In such cases, using the QuickBooks Install Diagnostic Tool can help fix the problem. This tool is available within the QuickBooks Tool Hub.
Follow the steps below to download and run it safely:
Step 1: Download and Install the QuickBooks Tool Hub
The QuickBooks Tool Hub contains several utilities that can help resolve different types of QuickBooks errors. For this issue, we’ll use the Install Diagnostic Tool to repair damaged installation files.
Tip: For the best performance, use Tool Hub on Windows 10 (64-bit).
- Visit the official Intuit website to download the QuickBooks Tool Hub.
- Save the downloaded file to a convenient location—such as your Downloads folder or Desktop.
- Open the downloaded file and follow the on-screen prompts to install the Tool Hub.
- Once installed, double-click the Tool Hub icon to launch it.
Step 2: Run the QuickBooks Install Diagnostic Tool
- Inside the Tool Hub, navigate to the Installation Issues tab.

- Click on QuickBooks Install Diagnostic Tool.
- Allow the tool to scan and repair installation issues. This may take several minutes.
- Once the process completes, restart your computer.
- Launch QuickBooks Desktop again and check if the subscription issue is resolved.
Solution 4: Install the Latest QuickBooks Desktop Updates
Outdated software can also cause errors like “Sorry, we need to verify your subscription before updating QuickBooks.” Keeping your QuickBooks Desktop up to date ensures smoother performance and helps fix known bugs.
Follow these steps to install the latest updates:

- Open QuickBooks Desktop, then go to the Help menu.
- Select Update QuickBooks Desktop to open the update window.
- Go to the Update Now tab and select the following options:
- Essentials
- New Features
- Maintenance Releases
- Help
- Accountant
- Click Get Updates, and once the download completes, restart QuickBooks.
- When prompted to install the updates, click Install Now.
- After installation, reopen QuickBooks and access your company file to verify if the error has been resolved.
Solution 5: Restore Your Product and License File
When you renew your QuickBooks Desktop subscription, the software stores your product and license information in a registration file on your computer. If this file becomes damaged or corrupted, QuickBooks may fail to recognize your active subscription, leading to the “QuickBooks Subscription Has Lapsed” error.
To fix this, you’ll need to restore your product and license file by following the steps below.
Tip: Before you begin, make sure you have your QuickBooks product and license numbers available. If you don’t have them, you can retrieve this information from your Intuit Account or purchase confirmation email.

Steps to Restore the Product and License File
- Close the QuickBooks Desktop application completely.
- Click the Windows Start icon and type Run in the search bar.
- Select the Run app from the results.
- In the Run dialog box, type the following path and press Enter:
C:\ProgramData\Intuit\Entitlement Client\v8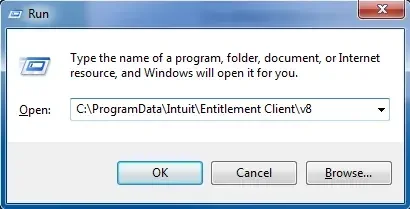
- If that folder doesn’t open, try this alternate path:
C:\ProgramData\Intuit\Entitlement Client\v6 - Locate and right-click the file named EntitlementDataStore.ecml.
- Select Delete, and when prompted, click Yes to confirm.
- Reopen QuickBooks Desktop and your company file.
- Follow the on-screen instructions to re-register QuickBooks using your product and license details.
After completing these steps, QuickBooks will recreate the damaged license file, allowing you to access your account without the subscription lapse error.
Solution 11: Manually Disable the Firewall and Antivirus
Sometimes, your firewall or antivirus software can block QuickBooks from connecting to the internet, leading to the “QuickBooks Subscription Has Lapsed” message. To check if this is the cause, try temporarily disabling your firewall and antivirus protection.
Steps to Manually Disable the Firewall and Antivirus
- Disable the Firewall first, then proceed to turn off the antivirus software.
- Locate your third-party antivirus icon in the system tray (bottom-right corner of your screen).
- Right-click the antivirus icon and select Disable or Turn Off Protection (options may vary depending on your software).

- Once disabled, reopen QuickBooks Desktop and check if the subscription lapsed error still appears.
Important: Remember to re-enable your firewall and antivirus after testing to keep your system protected.
How to Fix The QuickBooks Online Subscription Expired issue ?
For QuickBooks Online users, follow these steps:
- Log in to QuickBooks Online.
- If you see the QuickBooks Online subscription expired message, click Reactivate Subscription.
- Enter your payment details.
- Wait for Intuit to process the transaction (usually instant).
- Refresh the browser and log back in.
If you continue getting a QuickBooks subscription renewal failed alert, try:
- Clearing browser cache and cookies
- Using a different browser (Chrome, Edge, Firefox)
- Turning off VPN or proxy
How to Renew Your QuickBooks Subscription?
If you’re getting a QuickBooks subscription has lapsed/expired error, here’s how to fix it step-by-step.
- Log in to Your Intuit Account: Go to https://accounts.intuit.com and sign in using your QuickBooks credentials.
- Review Subscription Status: Once logged in, navigate to Billing & Subscription. If it shows “Expired”, “Payment Failed,” or “Not Renewed,” you’ll need to take action.
- Update Payment Method: Select Edit Payment Info and enter a valid card or bank account. Make sure your billing address matches the one registered with your bank.
- Click Renew or Reactivate: Once your payment method is updated, click Renew Now or Reactivate Subscription.
- Confirm Payment: Check your email for a confirmation message from Intuit.
- Restart QuickBooks: After renewal, restart your QuickBooks Desktop app or log out/in again in QuickBooks Online. Your QuickBooks subscription expired message should disappear.
Prevent Future QuickBooks Subscription Renewal Problems
Here are some smart ways to avoid the QuickBooks subscription has lapsed error in the future:
- Enable Auto-Renewal: Turn on automatic billing in your Intuit account.
- Set a Calendar Reminder: Add a QuickBooks subscription renewal reminder a few days before expiry.
- Keep Payment Info Updated: Always maintain an active card with sufficient balance.
- Watch for Intuit Emails: QuickBooks sends renewal alerts before expiry.
- Avoid VPNs During Payment: Regional payment gateways sometimes fail with masked IPs.
- Check Subscription Expiry Date Regularly: Don’t wait for the QuickBooks subscription expiry date reached message, renew early.
Conclusion
- A QuickBooks subscription has lapsed or expired message might seem frustrating — but it’s easy to fix once you know how.
- Renewing your plan, verifying your billing info, and keeping payment details current ensures you never lose access again.
- Stay proactive with renewal reminders, enable auto-renew, and keep your QuickBooks running seamlessly for your business success.
Frequently Asked Questions
When your QuickBooks subscription expires, you may still be able to open the program, but most features will become limited or inaccessible. You won’t be able to create invoices, run payroll, use online services, or access updates. To regain full functionality, you must renew your subscription.
To reactivate your subscription, sign in to your Intuit account, go to the Billing & Subscription section, and follow the prompts to update payment details or restart your plan. You can also reactivate through the QuickBooks application if prompted. Once renewed, all features are restored automatically.
Yes. QuickBooks Desktop and QuickBooks Online operate on a subscription model that requires periodic renewal—usually monthly or annually depending on your plan. Without renewal, your access to features, updates, and support will be restricted.
After purchasing a new license, reinstall QuickBooks Desktop and enter your new product and license numbers. Then open QuickBooks, choose File > Open or Restore Company, and select your backup file (.QBB). Follow the on-screen steps to restore your company data. Once restored, you can resume working with your updated license.
When your QuickBooks Desktop subscription expires, essential features such as payroll, bank feeds, security updates, and online services stop working. You can access your company file in a limited way, but most tools will be unavailable until you renew your subscription.